If you are using Google Tag Manager (GTM) to handle your Google Analytics, then you will need a way to populate the dataLayer with eCommerce data when you make a sale in your aMember site.
Here’s how I do it on my sites, using aMember’s own Conversion Track plugin.
Step 1: Add the dataLayer in Conversion Track plugin settings
NB: If you don’t have Conversion Track, you can order it from the “Addons Shop” in your aMember account.
I use two versions of the code so that the first ever payment made is tracked separately to repeat orders, but only the first one is compulsory if you don’t care about tracking first ever sale separately.
Here are the two code snippets in full:
Sale Tracking Code
<script>
// Sends transaction data with a pageview (DOM Ready)
window.dataLayer = window.dataLayer || [];
window.dataLayer.push({
  'event': 'amPurchase',
  'ecommerce': {
    'currencyCode': '%payment.currency%',
    'purchase': {
      'actionField': {
        'id': '%payment.transaction_id%', // Transaction ID. Required for purchases and refunds.
        'affiliation': '%afflogin%',
        'revenue': '%payment.amount%',    // Total transaction value (incl. tax and shipping)
        'tax':'%payment.tax%',
        'shipping': '%payment.shipping%',
        'coupon': '%invoice.coupon_code%'
      },
      'products': [
           // List of productFieldObjects.
           %foreach_product%{
           'name': '%item.item_title%',       // Name or ID is required.
           'id': '%item.item_id%',
           'category': 'Sale',
           'price': '%item.price%',
           'quantity': '%item.qty%',
           'coupon': '%invoice.coupon_code%'  // Optional fields may be omitted or set to empty string.
           },%endforeach_product%
       ]
    }
  }
});
</script>
First Sale Tracking Code (Optional)
<script>
// Sends transaction data with a pageview (DOM Ready)
window.dataLayer = window.dataLayer || [];
window.dataLayer.push({
  'event': 'amPurchase',
  'ecommerce': {
    'currencyCode': '%payment.currency%',
    'purchase': {
      'actionField': {
        'id': '%payment.transaction_id%', // Transaction ID. Required for purchases and refunds.
        'affiliation': '%afflogin%',
        'revenue': '%payment.amount%',    // Total transaction value (incl. tax and shipping)
        'tax':'%payment.tax%',
        'shipping': '%payment.shipping%',
        'coupon': '%invoice.coupon_code%'
      },
      'products': [
           // List of productFieldObjects.
           %foreach_product%{
           'name': '%item.item_title%',       // Name or ID is required.
           'id': '%item.item_id%',
           'category': 'Initial Sale',
           'price': '%item.price%',
           'quantity': '%item.qty%',
           'coupon': '%invoice.coupon_code%'  // Optional fields may be omitted or set to empty string.
           },%endforeach_product%
       ]
    }
  }
});
</script>
If you look carefully, the snippets only vary in the product category (“Sale” vs “Initial Sale”).
If you have free products, then you can optionally add this one too:
Free Signup (optional) Code
<script>
// Sends transaction data with a pageview (DOM Ready)
window.dataLayer = window.dataLayer || [];
window.dataLayer.push({
  'event': 'amPurchase',
  'ecommerce': {
    'currencyCode': '%invoice.currency%',
    'purchase': {
      'actionField': {
        'id': '%invoice.public_id%', // Transaction ID. Required for purchases and refunds.
        'affiliation': '%afflogin%',
        'revenue': '0.00',    // Total transaction value (incl. tax and shipping)
        'tax':'0.00',
        'shipping': '0.00',
        'coupon': '%invoice.coupon_code%'
      },
      'products': [
           // List of productFieldObjects.
           %foreach_product%{
           'name': '%item.item_title%',       // Name or ID is required.
           'id': '%item.item_id%',
           'category': 'Free Signup',
           'price': '%item.price%',
           'quantity': '%item.qty%',
           'coupon': '%invoice.coupon_code%'  // Optional fields may be omitted or set to empty string.
           },%endforeach_product%
       ]
    }
  }
});
</script>
Step 2: Setup the Event Trigger in GTM
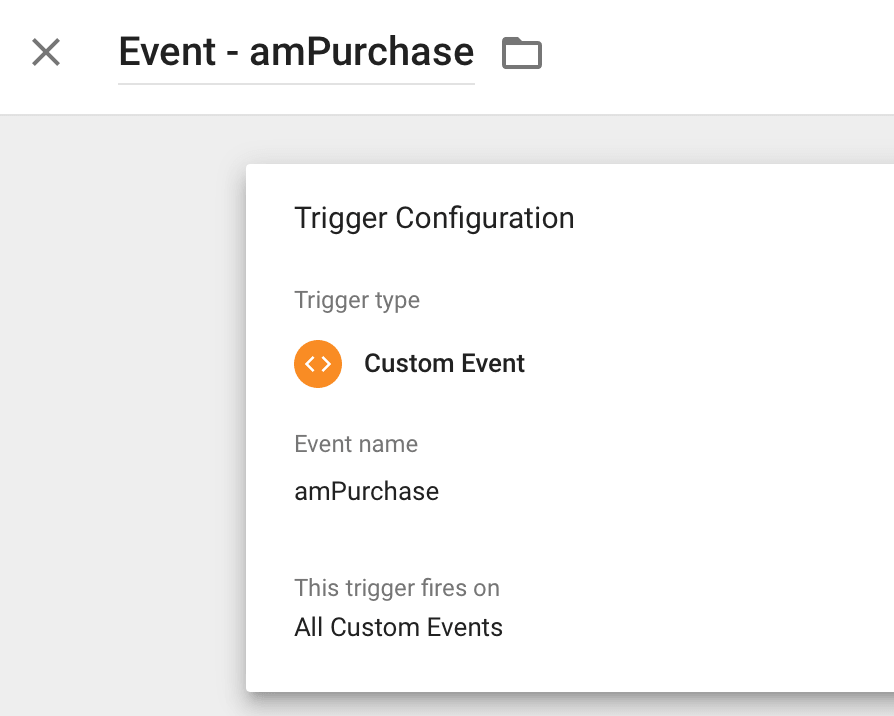
You may have noticed that my dataLayer snippets use an event to ensure the data is sent to GTM, so you will need to implement a custom event trigger called amPurchase in your GTM so that it knows what to do when aMember updates the dataLayer with your conversion data.
Here’s what mine looks like:

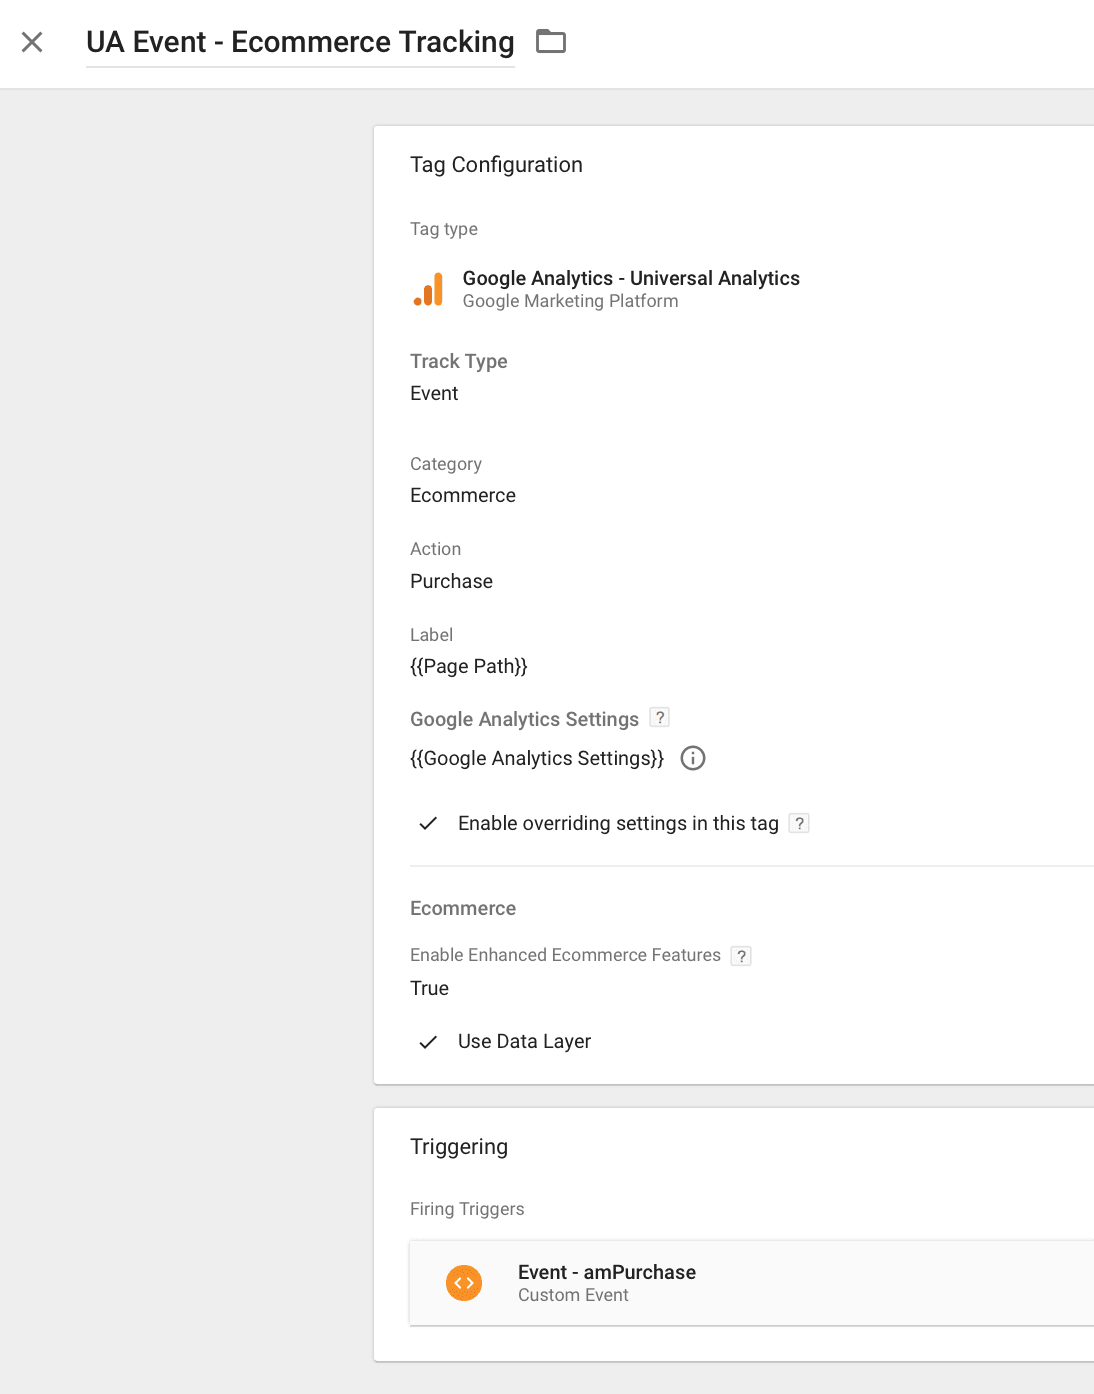
Step 3: Attach a UA Event Tag To The Trigger
Again, here’s what mine looks like:

And that’s it!


1 thought on “Enhanced Ecommerce Tracking With Google Tag Manager in aMember”